Step-by-Step Guide: Containerizing Your Vite React TypeScript Projects with Docker Compose
Table of contents
Introduction
Containerization has become an essential practice in modern software development. Docker Compose is a powerful tool that allows you to define and manage multi-container Docker applications.
In this step-by-step guide, I will guide you through four steps as we containerize our Vite React TypeScript application. Each step is explained in detail, making it easy for you to follow along and understand the process. By the end of this tutorial, you will have successfully containerized your application and gained valuable knowledge about Docker Compose, Dockerfile and containerization. Let's get started!
Prerequisites
While this tutorial provides step-by-step explanations for each concept, having a basic understanding of these below will help you better grasp the concepts and instructions.
Basic knowledge of React and TypeScript
Docker installed on your development machine
Familiarity with Vite, a fast development server and build tool for modern web applications
Step 1: Creating a Vite project
To create a new Vite project with React, open your terminal and run this command:
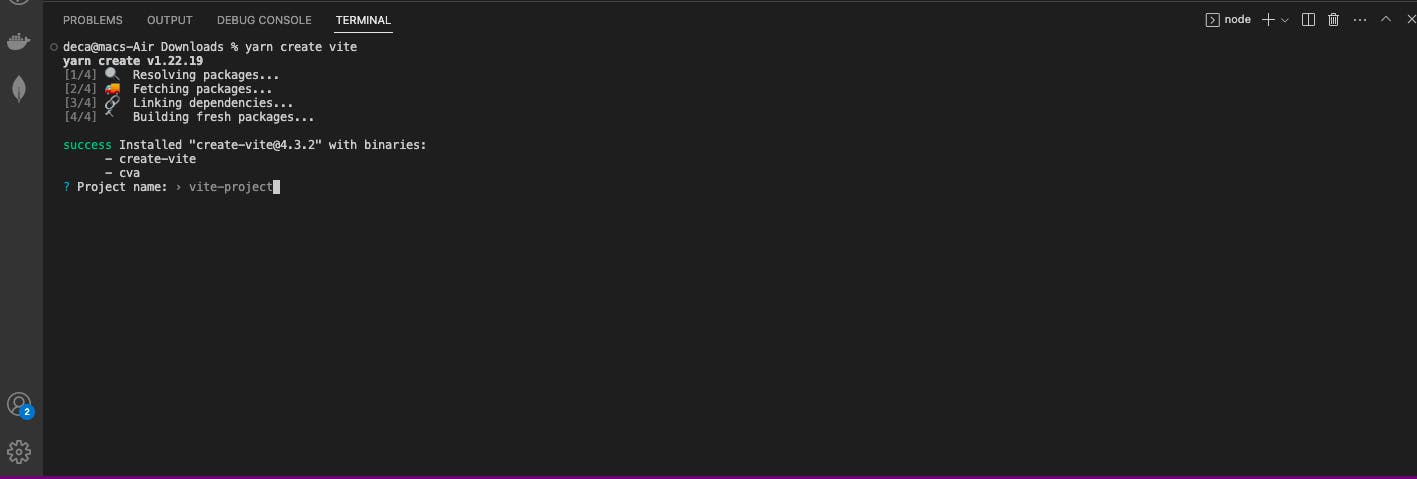
yarn create vite
This command will generate a name prompt that would allow you choose a name, for this project, the name new-project was used as an example. You can enter any desired name for your project and press Enter.
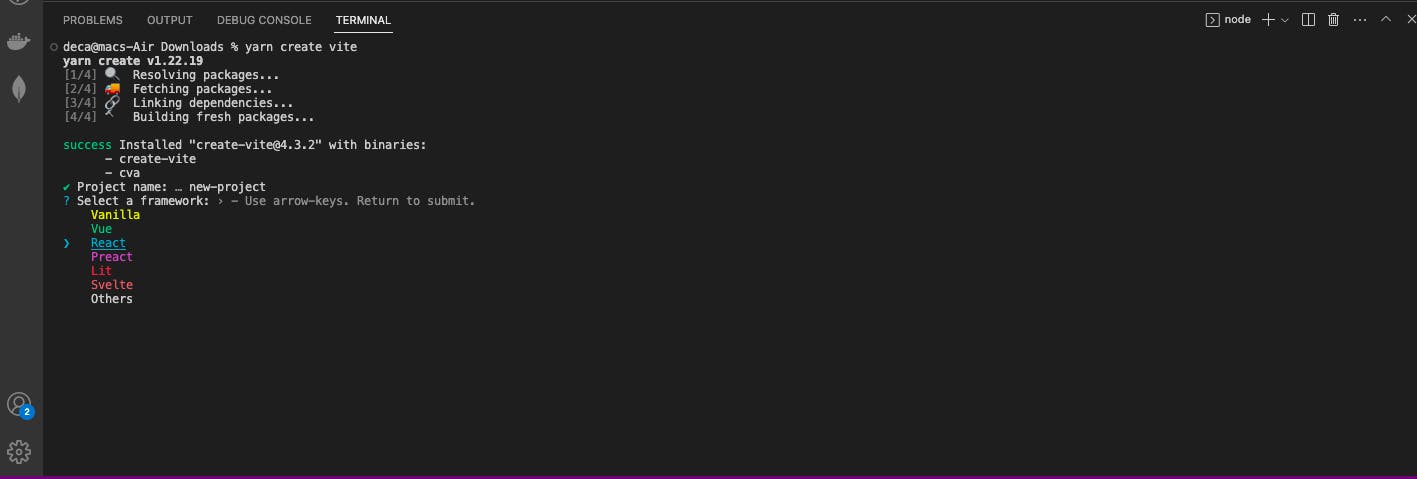
Next, It displays a list of frameworks that you can choose from. Using the arrow keys on your keyboard, navigate to the "React" option and press Enter to select React as the framework for your project.
Following the framework selection, a list of variant options will be displayed. In this case, "Typescript" was chosen as the variant for the project. You can select the desired variant by using the arrow keys and then press Enter to confirm.
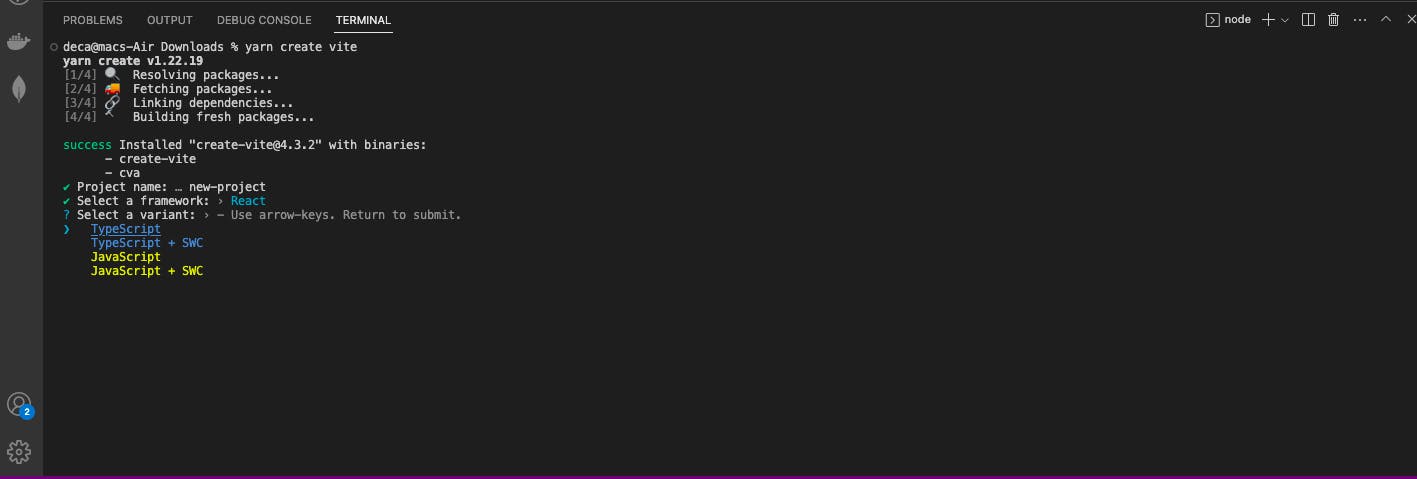
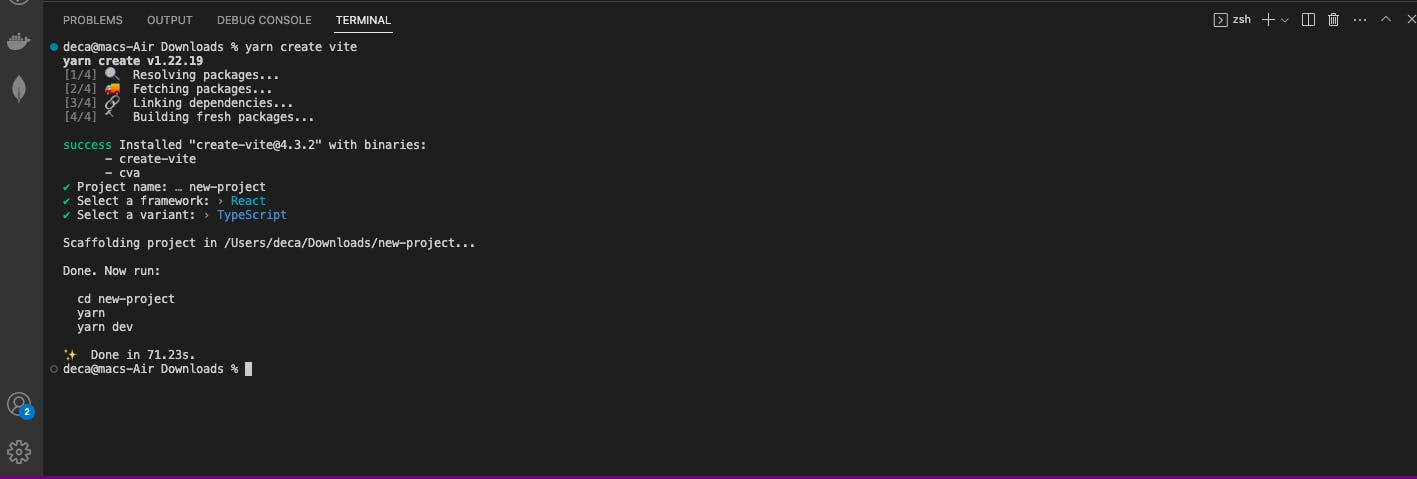
Once you have completed these prompts, the project setup is finished. You can navigate to the project directory, install dependencies and start your React Typescript application using the commands below.
cd new-project //To enter into the project directory
yarn //This installs the dependencies
yarn dev  // This runs the application
Step 2: Configuring the Vite server
Inside your new-project directory, locate the vite.config.ts file. Open this file and replace its contents with the following code:
import { defineConfig } from "vite";
import react from "@vitejs/plugin-react";

export default defineConfig({
  plugins: [react()],
  server: {
    watch: {
      usePolling: true,
    },
    host: true,
    strictPort: true,
    port: 5173,
  },
});
Let's explore the relevance of each line in the vite.config.ts file as I think it's important to understand every aspect of the code you write.
import { defineConfig } from "vite";: This line imports thedefineConfigfunction from Vite, which allows us to define the configuration for our project.
import react from "@vitejs/plugin-react";: This line imports the Vite plugin for React, which enables React support in our Vite project.
export default defineConfig({ ... }): This line exports the configuration object for Vite.
plugins: [react()]: This line configures Vite to use the React plugin we imported earlier.
server: { ... }: This block configures the Vite development server.
watch: { usePolling: true }: This line enables polling-based file watching, which can be useful in certain environments.
host: true: This line allows the Docker Container port mapping to work correctly.
strictPort: true: This line enforces that only the specified port is used for the Vite server.
port: 5173: This line sets the port number for the Vite server. You can replace this value with any desired port number.
Step 3: Setting up Dockerfile and Docker Compose
Dockerfile Setup
Install Docker and Docker Compose: If you haven't already, install Docker and Docker Compose on your development machine. You can find detailed installation instructions for your specific operating system in the official Docker documentation.
Create a Dockerfile: In the root directory of your Vite React application, create a file named Dockerfile. This file will define the configuration for building a Docker image of your application. Here's a basic example to get started:
FROM node:lts-alpine

WORKDIR /app

COPY package.json .

RUN yarn

COPY . .

## EXPOSE [Port you mentioned in the vite.config file]

EXPOSE 5173

CMD ["yarn", "dev"]
I understand that the code above might appear confusing to some people, however, this is a line-by-line explanation
FROM node:lts-alpine: This line specifies the base image for your Docker image. It uses thenodeimage with thelts-alpinetag, which provides a lightweight version of Node.js.WORKDIR /app: This sets the working directory inside the container to/app. All subsequent commands will be executed relative to this directory.COPY package.json .: This copies thepackage.jsonfile from the current directory (your project directory) into the/appdirectory in the container. It allows Docker to cache the dependencies installation step separately from the application code.RUN yarn: This command runs theyarncommand inside the container to install the project dependencies based on thepackage.jsonfile. This step utilizes the Docker cache, so if thepackage.jsonfile doesn't change, Docker will use the cached dependencies instead of reinstalling them.COPY . .: This line copies all the files and directories from the current directory (your project directory) into the/appdirectory in the container. It includes your application code, configuration files, and any other necessary files.EXPOSE 5173: This instruction informs Docker that the container will listen on port5173. Although you mentioned using the port specified in thevite.configfile, the provided Dockerfile uses the port5173for demonstration purposes. You can replace5173with the actual port number you want to expose.CMD ["yarn", "dev"]: This sets the default command to be executed when the container starts. It runs theyarn devcommand, which is typically used to start the development server for your Vite React application.
Docker Compose Setup
Create a file named docker-compose.yaml or a docker-compose.yml file in the same root directory. This file will define the services and configurations for your Docker Compose setup. Here's an example:
# docker-compose.yml
version: '3'
services:
  app:
    build:
      context: .
      dockerfile: Dockerfile
    ports:
      - 3001:5173
    volumes:
      - .:/app
version: '3': This line specifies the version of the Docker Compose file format being used. In this case, it uses version 3.services:: This section defines the services (containers) that make up your Docker Compose setup.app:: This is the name of the service. You can choose any name you prefer.build:: This block defines the build configuration for the service.context: .: This line specifies the build context, which is the path to the directory containing theDockerfileand the application code. In this case, the.represents the current directory.dockerfile: Dockerfile: This line specifies the filename of the Dockerfile to use for building the Docker image. In this case, it's namedDockerfile(assuming it's in the same directory as thedocker-compose.ymlfile).ports:: This block defines the port mappings between the host machine and the container.- 3001:5173: This line maps the port3001on the host machine to port5173on the container. This basically means that the second port is for your local machine while the first one is for Docker. It allows you to access the Vite React application running inside the container throughhttp://localhost:3001in your web browser. You can change the first port number (3001) to any available port on your host machine.volumes:: This block defines the volume mappings between the host machine and the container. In Docker, volumes provide a way to persist and share data between the host machine and the container. They allow files and directories to be shared and updated in real time.- .:/app: This line maps the current directory (where thedocker-compose.ymlfile is located) on the host machine to the/appdirectory inside the container. It enables live code reloading by synchronizing the files between the host and the container.
Step 4: Starting the Docker Compose environment
To start the Docker Compose environment and run your Vite React application, open a terminal or command prompt, navigate to the directory containing the docker-compose.yml file, and run the following command:
docker compose up
Possible Errors and Solutions:
no configuration file provided: not found : This error message indicates that the docker-compose.yml or docker-compose.yaml file could not be found in the current directory. To resolve this, make sure you are in the correct directory that contains the Docker Compose file or navigate to the directory where the file is located before running the docker compose up command.
Cannot connect to the Docker daemon at unix:///var/run/docker.sock. Is the docker daemon running? : This error message suggests that the Docker daemon, the background service that manages Docker containers, is not running or not accessible. The Docker daemon needs to be active for Docker commands to work.
To fix this issue, you can start the Docker daemon by launching the Docker application. After starting the Docker daemon, wait a few moments for it to initialize, and then try running the Docker command or the docker compose up command again. It should now be able to containerize your React Typescript application.
After it is done, visit this URL http://localhost:3001 in your web browser, and you should be able to view your application.
Conclusion
In this article, we began by setting up a Vite React TypeScript project and configuring the Vite server. We explored the contents of the vite.config.js file and explained the purpose of each line.
Next, we delved into creating the Dockerfile and Docker Compose files. Then, we covered starting the Docker Compose environment using the command docker compose up and addressed possible errors that may occur during the containerization process.
Congratulations! You have now successfully containerized your Vite React TypeScript application.
Resources and References
"How to use React or Vue with Vite and Docker", Nikhil Malik
"How to Use the Node Docker Official Image", Tyler Charboneau
